
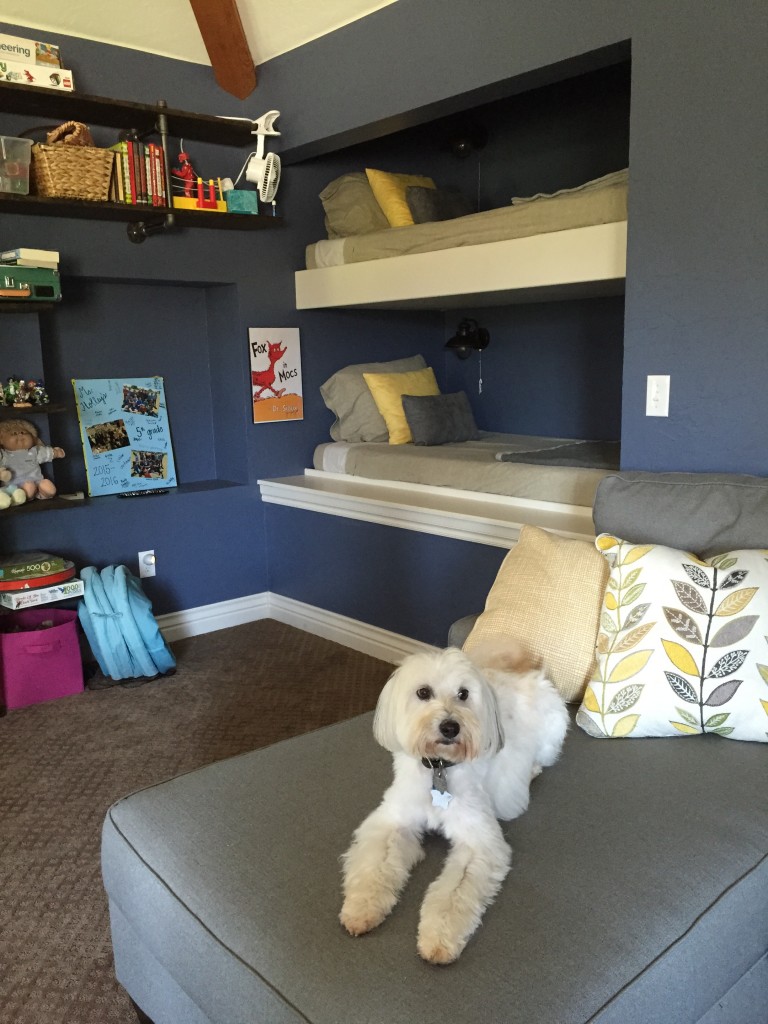
A big part of our bonus room add-on was building built in bunk beds for our boys. My only bunk bed experience was at summer camp as a kid and like all kids loved them. We wanted a fun place for the boys to have sleep overs, hang out, read a book. Basically, a place for all of the fun memory-making kid stuff and bunk beds was a must-have.
I knew from the beginning that I would be the one changing sheets, so I needed something that would make it less like wrestling an alligator into a swaddle and more like when Cinderella’s birdie friends make her bed for her.
I needed easy bunk bed sheets.
Necessity is the mother of invention so I considered the hardest part of making bunk beds…the bottom corner, closest to the wall. I knew if I could just keep that corner permanently tucked in, I would have the battle half won so I decided the sew the sheets together.
If you’re looking for a solution to making bunk beds and keeping the sheets from being a tangled mess, I have the answer.
DIY easy bunk bed sheets
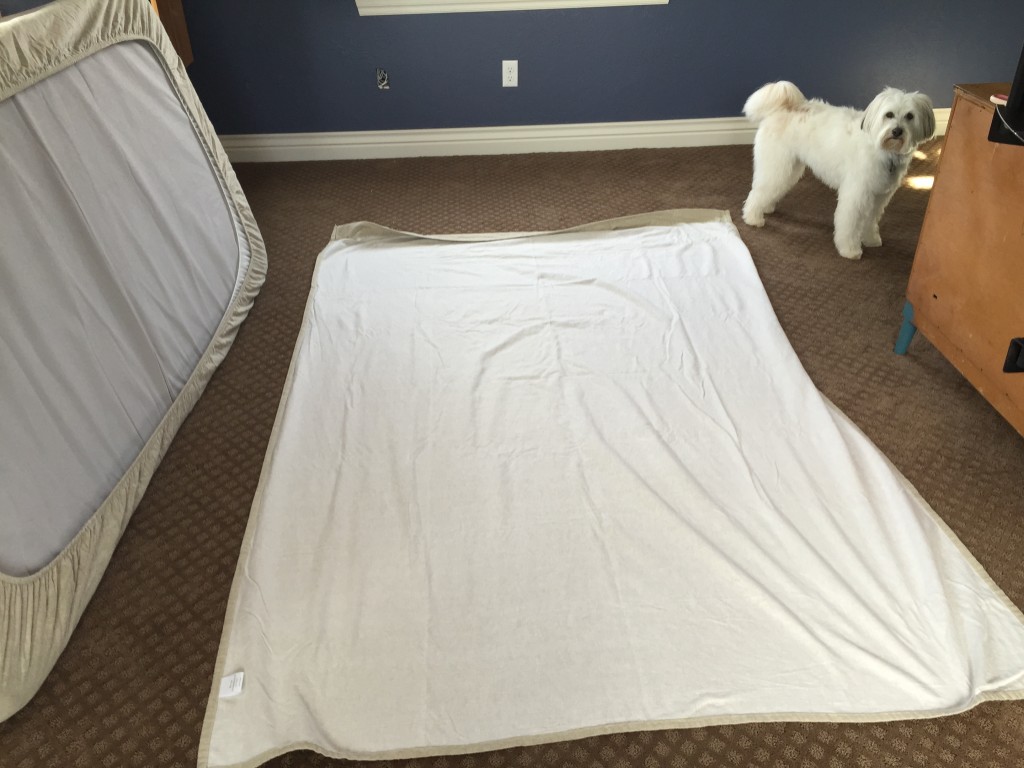
1. Pull the mattress off the bed and put the fitted sheet on it. Lay top sheet, right side down, on the floor. Put the mattress on top of the sheet so that the sheets are touching.
I like to make my bed so that the good side of the top sheet is facing up. If you’re one of those people who makes their bed so that the top sheet is facing down (so that when you slide into bed, you’re feet are caressing the pattern – assuming there is a pattern) then you will want to do the opposite of what I did. My mom is one of those people. She says she likes to do it that way so that when she makes the bed and folds the top of the sheet down, she can see the decorative stitching. She’s fancy like that.
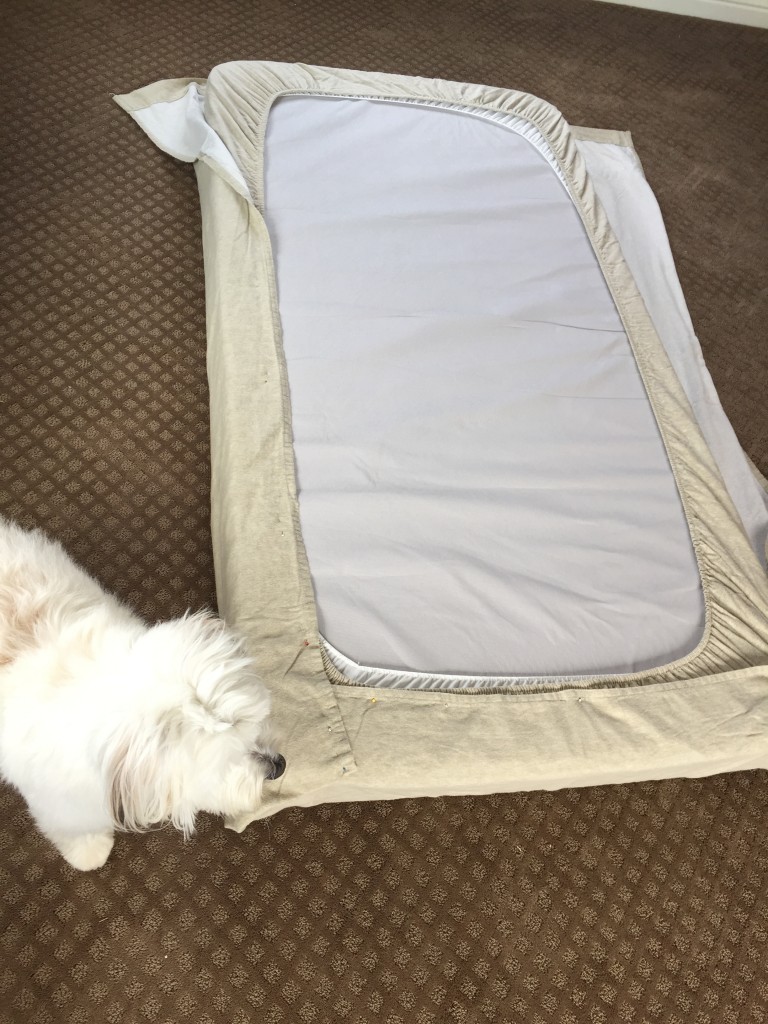
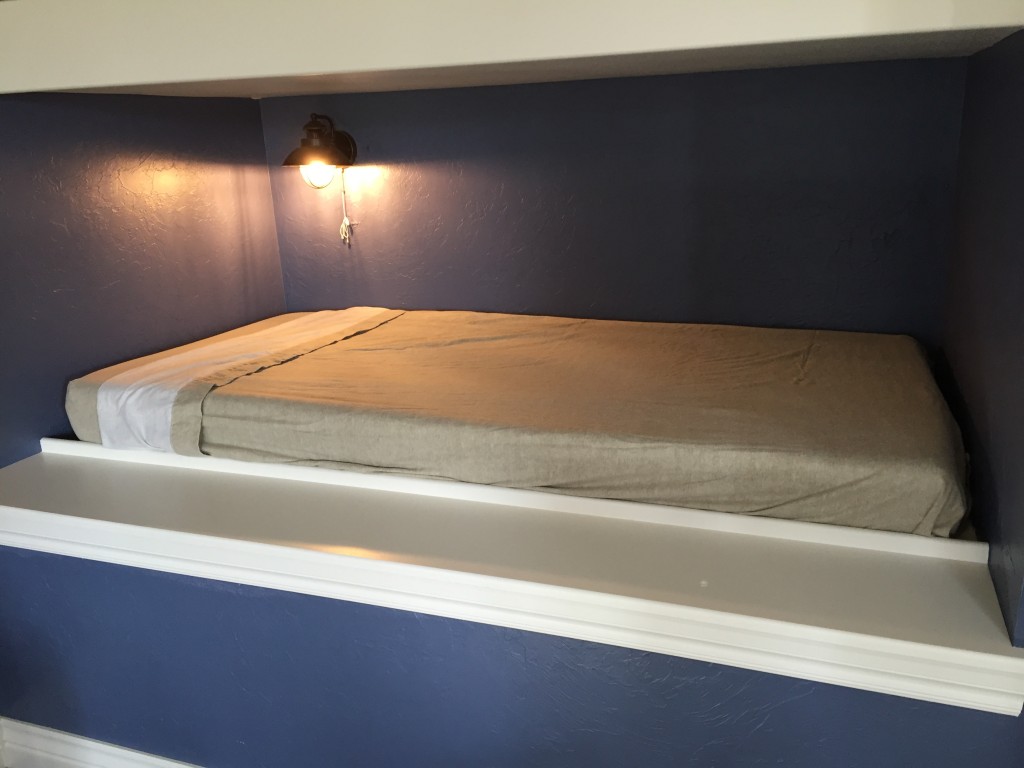
2. Imagine you are about to flip the mattress over and slide it right onto the bed. Which corner would be against the wall at the foot of the bed? That is the corner you want to fold. Fold the top sheet along the side and bottom of the mattress and make the corner nice and neat.
If my dog weren’t in the way, you would be able to see the corner folded to make my military school dad proud.
In this picture, the folded corner is bottom left. But when I flip the mattress over it will be the bottom right. Make sense?
3. Pin the sheets together (make sure not to pin the mattress pad) three-quarters along the bottom, the corner and fold and halfway up the side. Place a safety pin at the beginning and end of the pins.
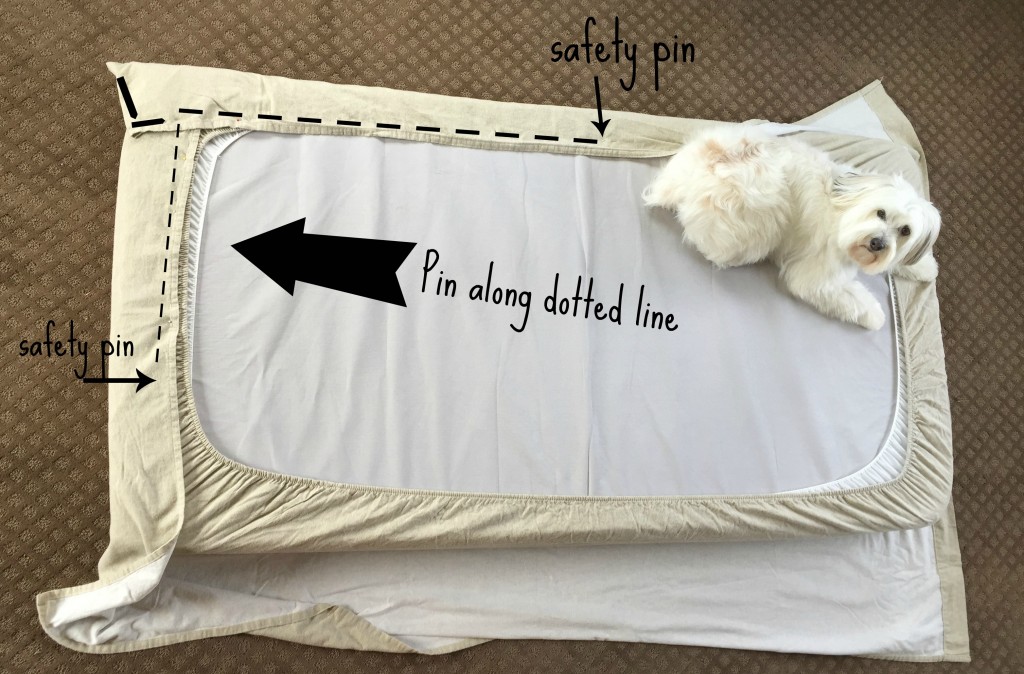
4. Remove sheets from the mattress, taking care to keep the sheets together. This will get tricky because the elastic will make everything scrunch together but don’t fear, you have the safety pins to help you know where to start sewing.
5. Sew the top sheet to the bottom sheet. In my mind, I pictured myself zipping right through this part but this was the hardest part of the whole process. As you sew, you have to hold the elastic tight so that the pins line up and the top sheet is sewn to the fitted sheet as it would if it were on the mattress. I may or may not have cussed as I was sewing and trying to keep the elastic pulled tight and sheets lined up.
I considered sewing all around both bottom corners so that both corners would stay permanently tucked in. However, I was afraid this would make the bed feel more like a sleeping bag and make claustrophobic sleepers have bad dreams.
I don’t have a picture of this part because of the holding the sheet tight and cussing thing.
6. With mattress still off of the bunk, put sheets on. Pull top sheet up and fold the top the way you like it. Slide the mattress onto the bunk and tuck in the exposed side.
Making the Bed
Since sewing my sheets together I’ve had plenty of opportunities to change the sheets. I’ve found the method that works for me is to completely remove the mattress from the bed. I bought mattresses that are light weight specifically because I knew I might be taking them on and off and would have to lift one over my head. I would rather get an upper body work out by hefting the mattress on and off the bed rather than try and make the bed while on top of it. Have you ever tried to make a bed and straighten out sheets while you’re on top of the sheets? There is a lot of bouncing and trying to pull the sheets up mid bounce.
There you have it, easy bunk bed sheets. Go forth and may all your sheets stay tightly tucked.


Marisa
This is seriously brilliant. I don’t have a bunk bed, but I’m kind of considering sewing my sheets together so a certain SOMEONE can’t just steal all the covers in the night.
Also, I would very much like to have built in bunk beds of my very own. Am I allowed to have those at my age?
Stephanie Clinton
By “someone” stealing all the sheets, you mean the dog. Right?
Yes, you are absolutely allowed to have bunk beds at you’re age.
Melissa
So glad to hear that you put the flat sheet on “right”. I know someone who puts it on “wrong” because the soft side must touch him. It’s upside down!
Laurie
I made similar sheets for our waterbed 40 years ago, but had forgotten how I did it. We now have bunk beds at our log cabin for the grandkids and now that I am a bunk bed maker I was wishing just the other day for a way to do exactly what you have just shared. Thank you very much from a very grateful nana!
dorothea
i just read your tutorial i have a camper that has 3 bunks..i made envelop type covers from king sheets so the extra folded over as the top sheet,but what a struggle every time we have to try to stuff them like sausages. cant wait to try this. i think i will remove the elastic sew top sheet then replace the elastic maybe less frustrating ill let you know.
Tanya
I know this is an old post, but boy, did I have a good laugh reading this post. Love your style.
Stephanie Clinton
Glad you found it! It may be an old post…but a freshly made bed is timeless 😉
Tory
I made these today for my daughter using your tutorial! My finished product was not pretty but is oh so functional and you don’t see the mess – so hooray!
Thank you for saving me $60!!
Stephanie Clinton
I’m so glad you used the tutorial! Thanks so much for letting me know. One word of advice when it comes to folding them when you need to store them away…it takes a bit of patience and practice to learn to fold them so they don’t just look like a big ball of wadded up sheets.
heather
I have been trying to figure out a way to keep the sheets in place on the bunks that we have built into the bus we are renovating. This may work perfectly!!! I’m not a great seamstress, so I’m sure that the cussing part will be part of my pattern as well. 🙂 Thank you for a great read and great idea!
Stephanie Clinton
I hope this solution works for your bunk beds. One word of advice…don’t get frustrated when it’s time to fold and put the sheets away. It take a lot of practice to get them to fold up into something that doesn’t look like a big ball of sheets. Good luck!
BRENDA J SMITH
I have 2 kneereplacements and its very hard to make bunk beds. OI know to use a small ladder but its trying to get the fitted sheet on and by the way I am 70 years old
Amy C
Your top sheet is upside down, but this is a great idea! The “right” sides of the sheets should always be touching. That way, when the top is folded over a blanket, it looks nice.
FurnitureBoos
Thank you for sharing your DIY easy bunk bed sheet solution! This seems like a great idea for those who want to simplify the process of making and changing sheets for bunk beds. I like how you thought creatively about the problem and seem to have found a solution that works for me. Your instructions are clear and easy to follow, and I appreciate the advice to adjust the orientation of the top sheet depending on personal preference. I’m sure other readers will find this helpful. Happy bed making!
thecolourlife
Could you send me how to fold fitted sheets? I would really appreciate it
thecolourlife
Could you send me how to fold fitted sheets? I would really appreciate it
Ariful Islam
That’s Great! I got very valuable information from here.